Moving on my plans to enlarge my knowledge with a logic leitmotif, I decided that the correct next step was to improve my skill in prototyping my ideas. I am able to conceive little funny (stupid) electronic device, like beacon, <>… But once finished the electronic logic, the circuit board, the board schematic and to write code you have to create the shell in order to achieve the status of “working prototype”.
The “final” step of prototyping by the way it’s not so easy or fast if you are not familiar with 3D technical design. In the past, I used to draw my cases with Sketch, then I passed the .stl file to my 3D printer (a Flashforge Finder gen 1), but it was not the smartest way to procede: in fact, you will really fortunate to have a first print that’s exactly fit the circuit board. Usually, you have to print, check the case, correct the design and reprint. This is a cost, both in term of printing PLA filament, in time and in energy to invest.
In addition, SketchUp, that I used to use on daily basis is not available anymore as standalone version for the free edition (the last free version you can install on your machine still the 2017 Maker Edition); now, it’s browser-based and not so comfortable to use.
So, thank a proficient discussion with a friend of my Hacker/Maker Space in Bologna (fablabbologna.org), I enjoyed to learn about the parametric design: in this 3D modeling technique you will be super faster in correct the design changing only few parameters using, for example, slide selector. You have not to redraw entire stage of your model wasting time.
Giovanni Ferrari was so gentle to invest hours and hours of his time to teach me Grasshopper 3D: a plug-in for Rhinoceros 3D that, thanks to a visual programming language interface, presents the users to create and edit geometry.
On Grasshopper, components (or nodes) are dragged onto a canvas in order to build a definition. It’s based on graphs that map the flow of relations from parameters through user-defined functions (the nodes): this is resulting in the generation of geometry. Changing the parameters or the geometry itself causes the changes to be propagated throughout all functions in the project, and the geometry to be redrawn.
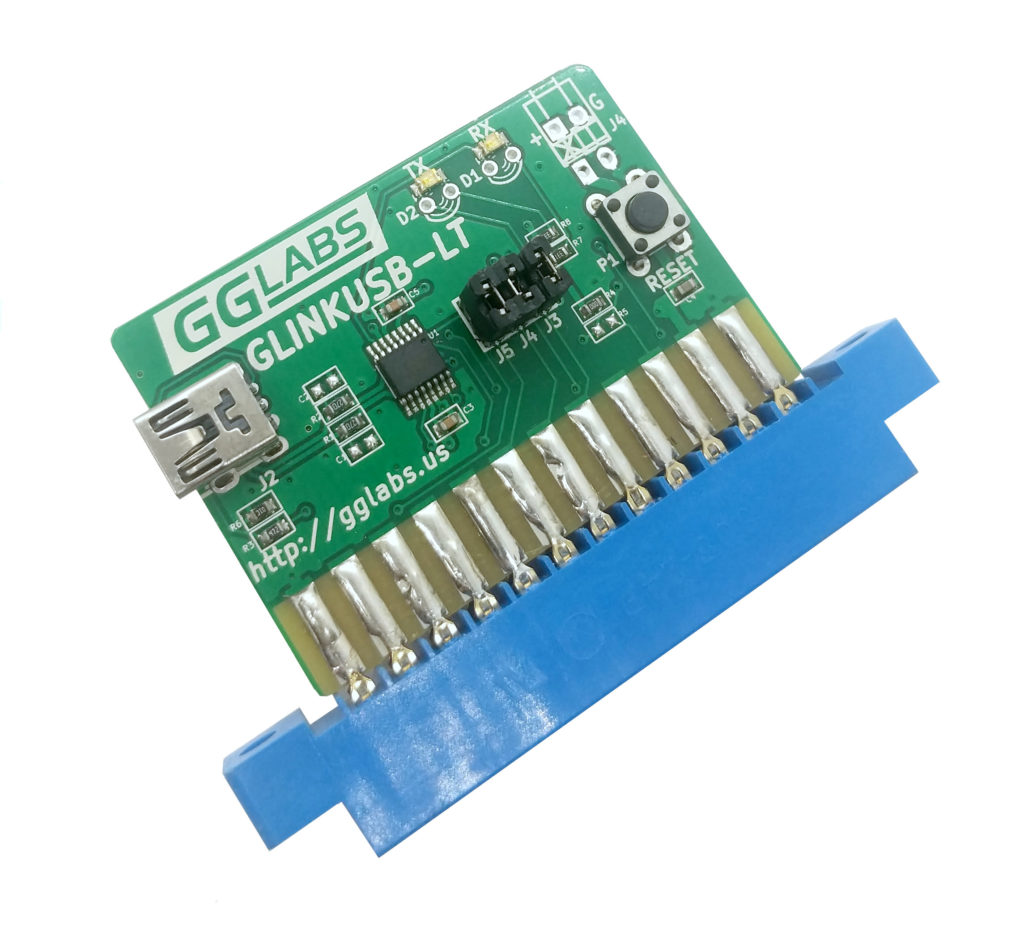
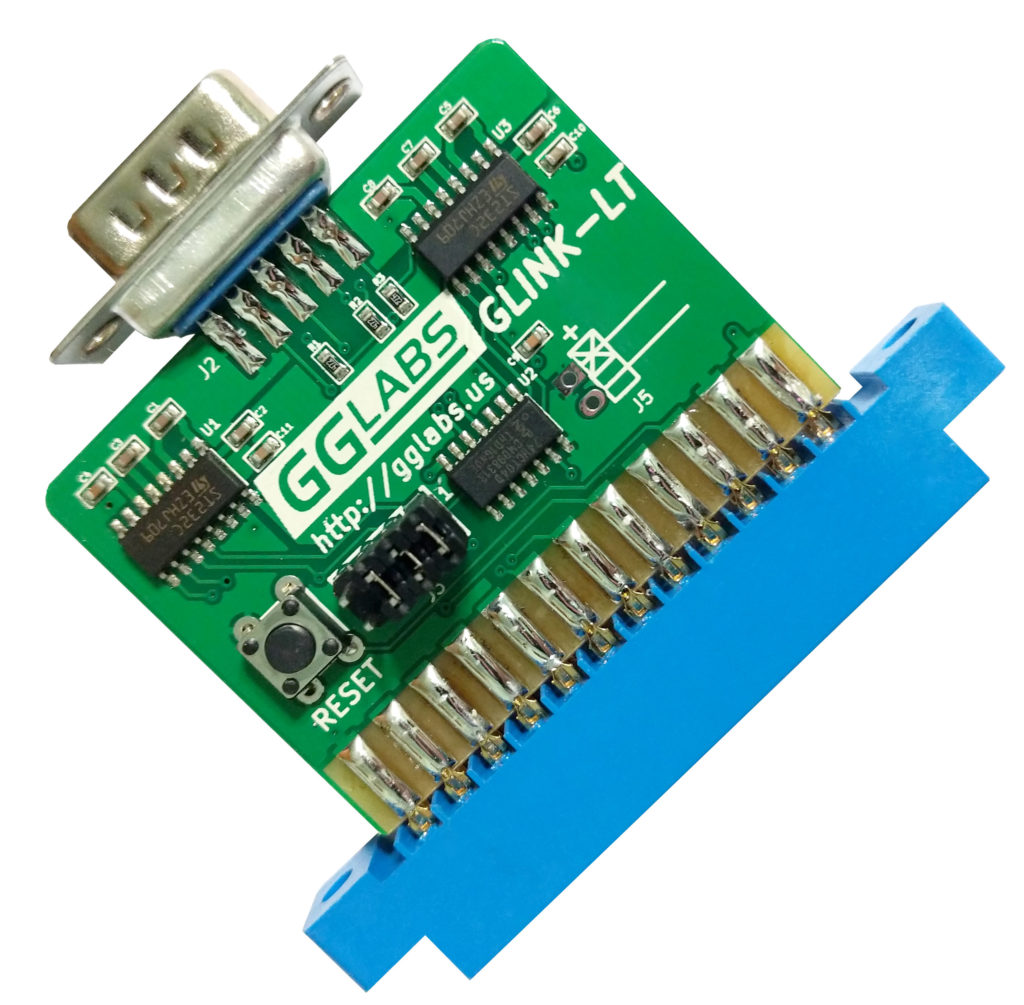
I decided the best way to start my learning phase on parametric design was to create a simple case for two boards I purchased on eBay. These boards boards are Serial User Port to RS232 (GLINK-LT) and to USB (GLINKUSB-LT) for Commodore 64 and 128 from GGlabs.us. These devices allow to communicate through serial port on Windows/Linux/Mac OS computer using the user port on Commodore 8-bit machines.
You can see the challenge.
Same user port for the Commodore. But on the other side, different ports for standard RS232 and mini-usb socket, in addition, also the reset button is moving its position.
With Giovanni, we decided to move on drawing the case on Grasshopper, but on the same design file. So: one design file for two different boards.
After weeks of tries and tries, of printing errors, refining, at the end we reached a very satisfying result!
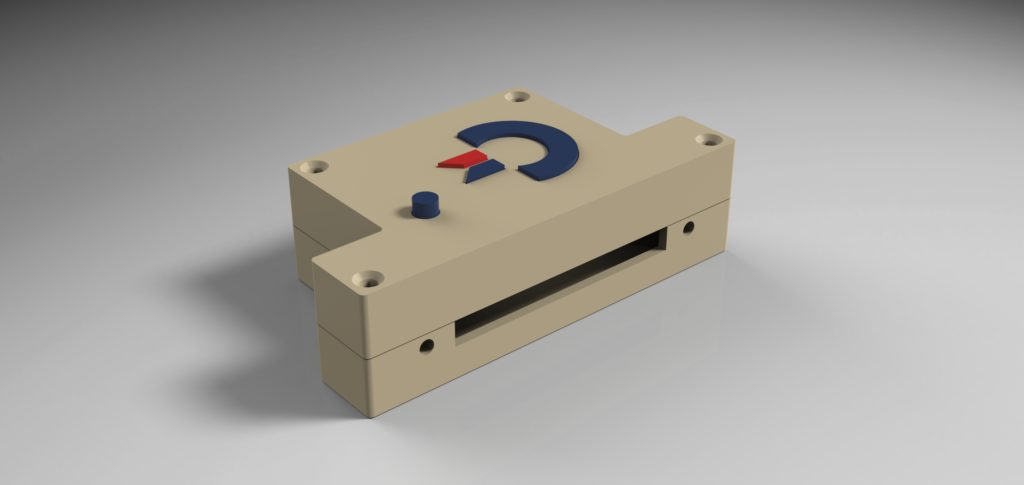
The RS232 version by the front side. 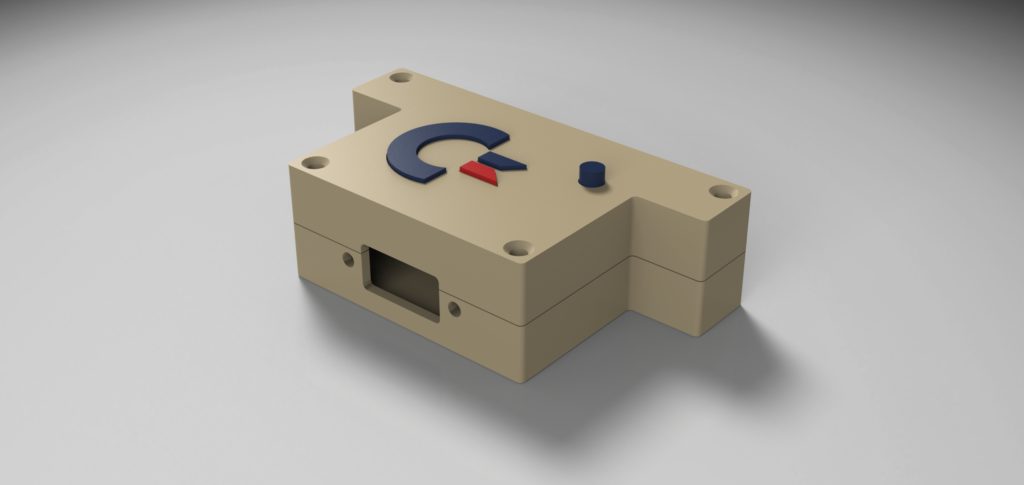
The RS232 by the back side.
The mini-USB version by the front side. 
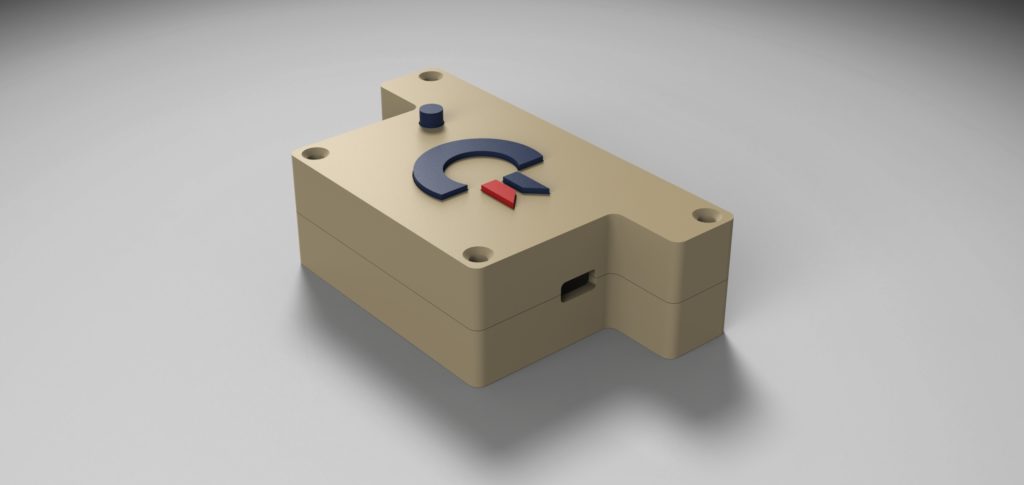
The mini-USB version by the back side.
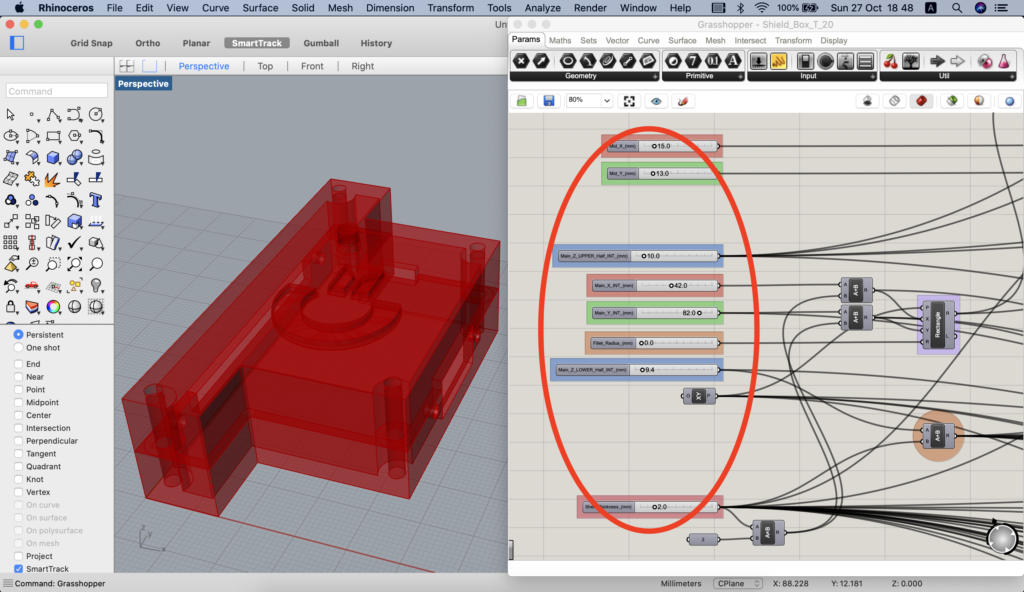
As already said, having both the two versions of the case in the same definition was challenging. The result is something like that:
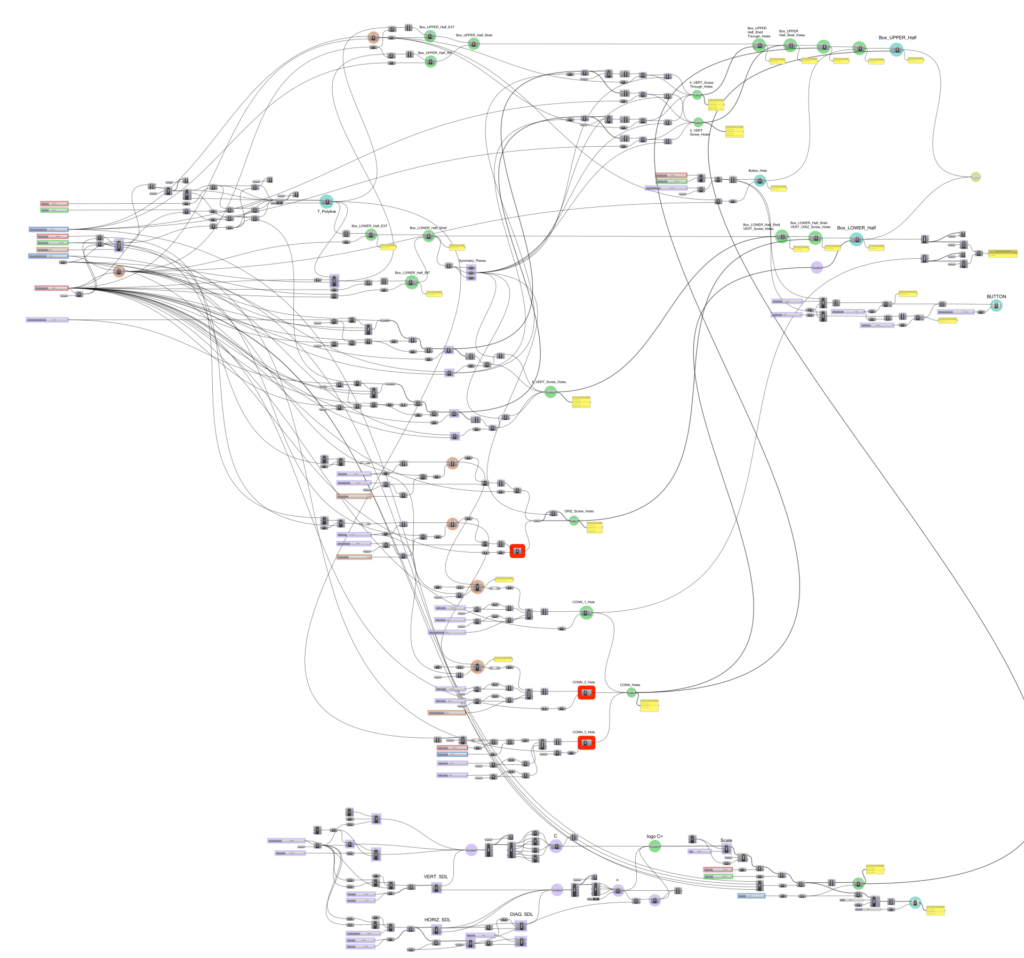
The definition above generates a polisurface inside Rhino 3D:
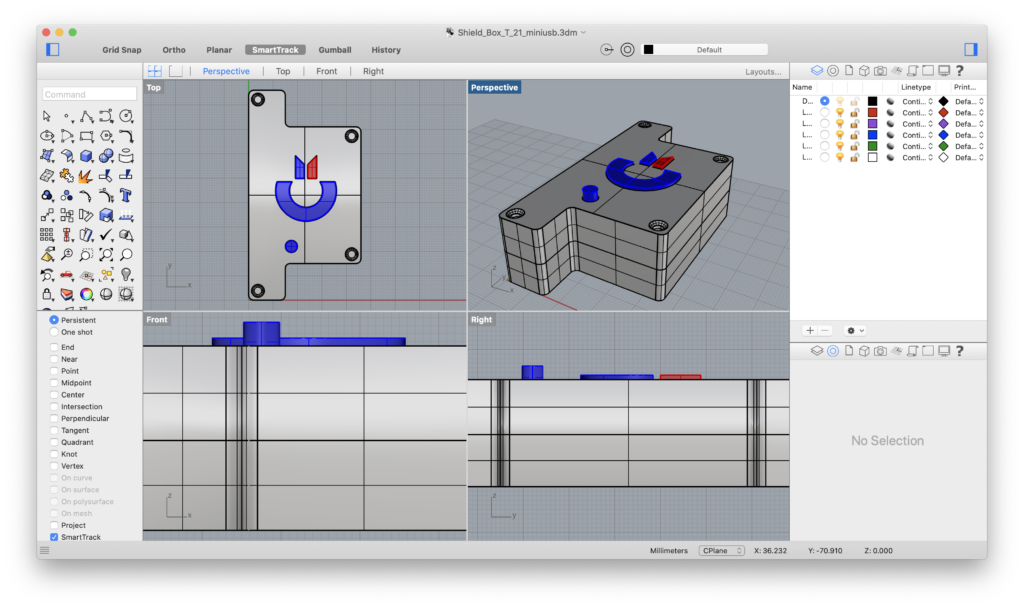

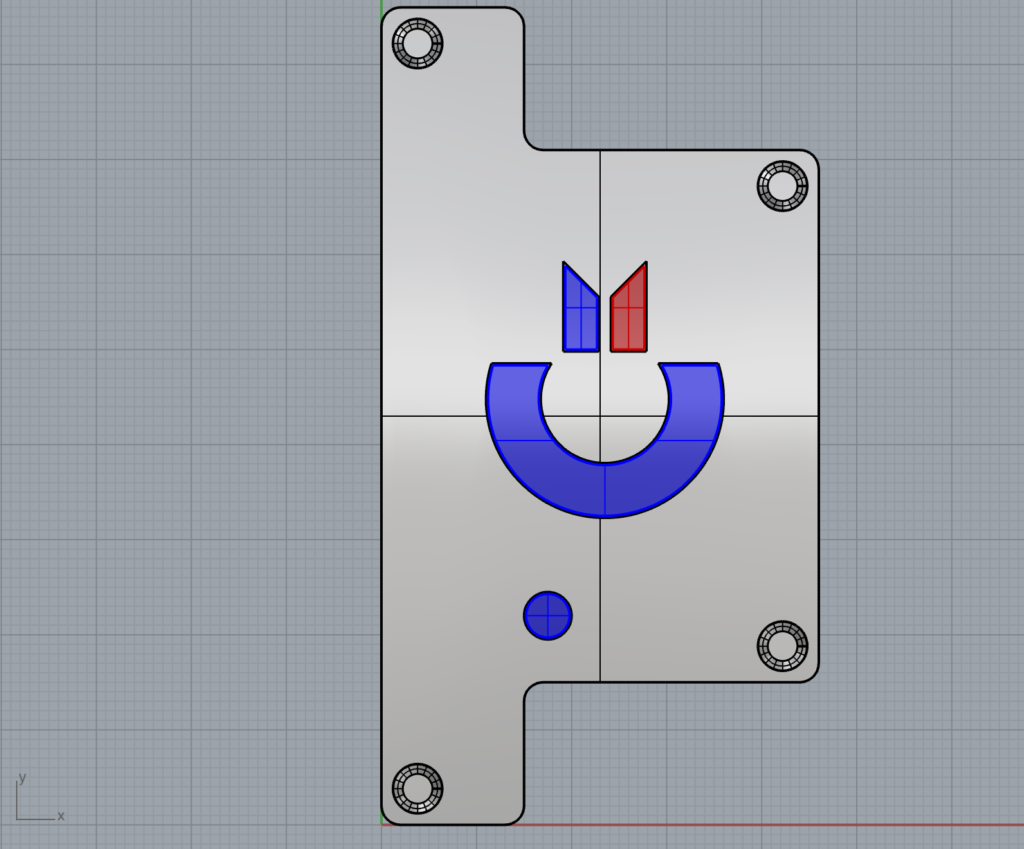
Top 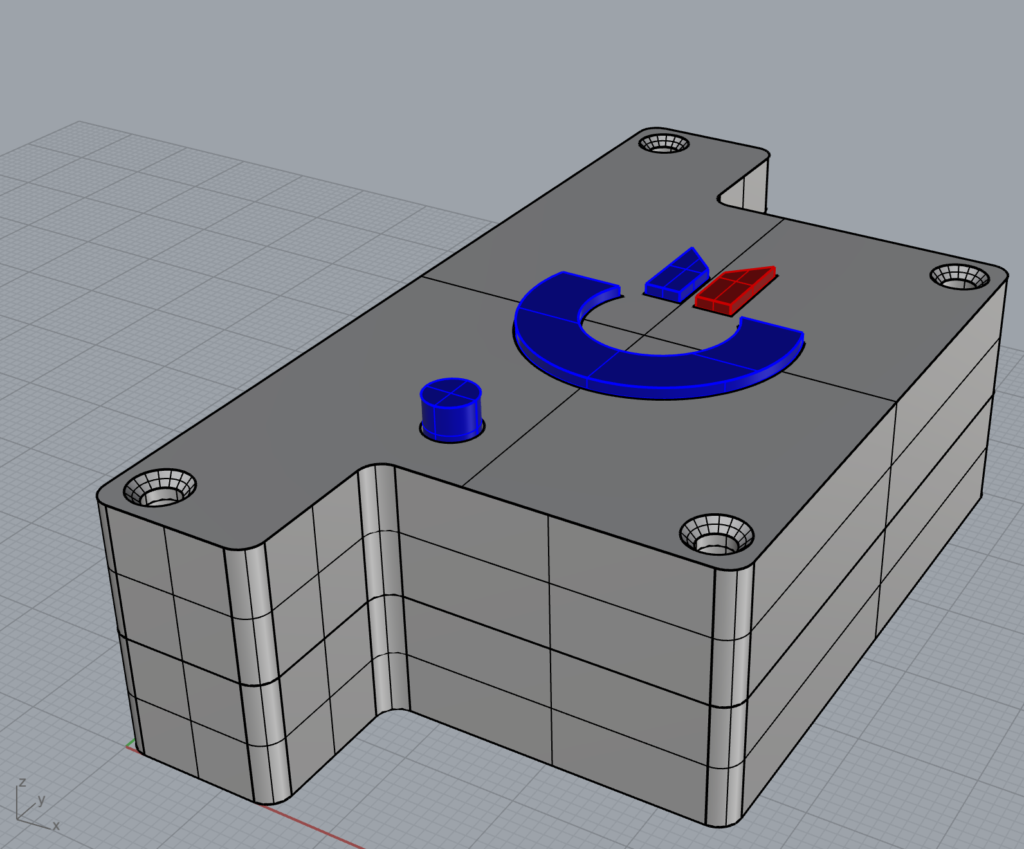
Perspective 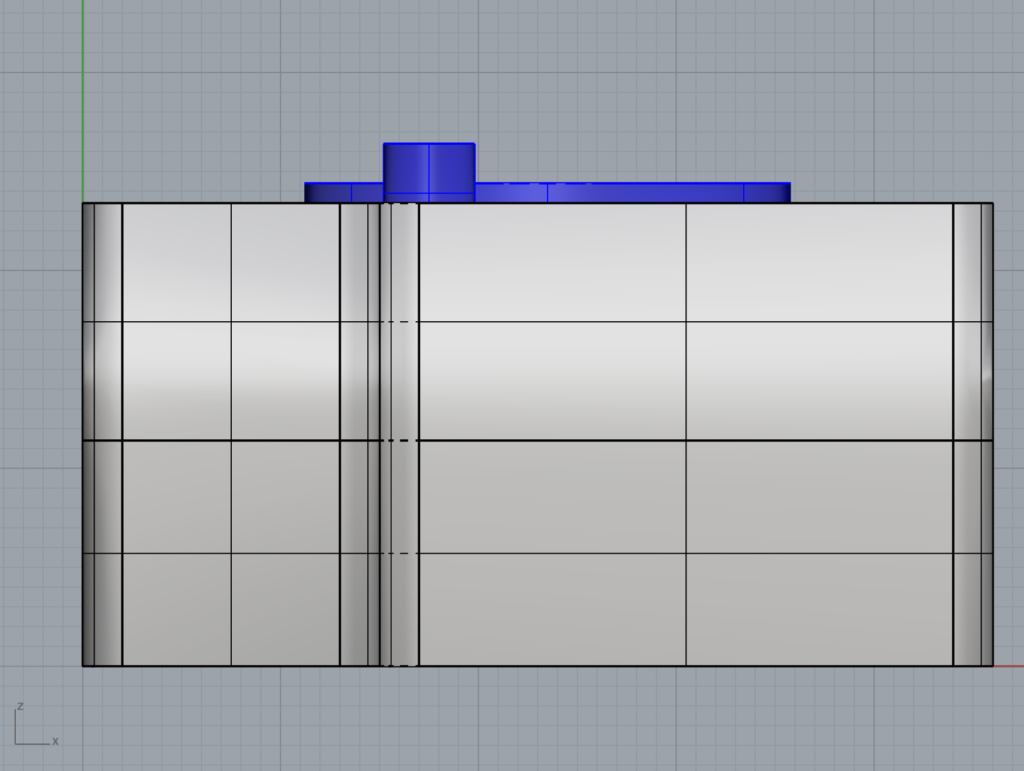
Right 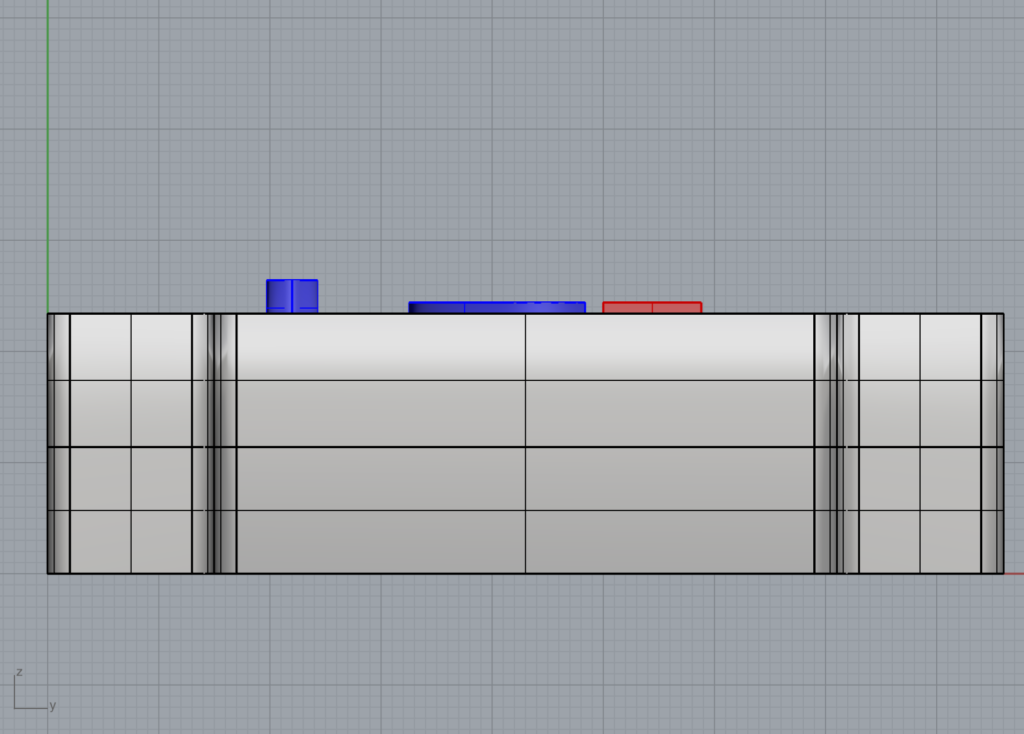
Front
Why am I so excited about Grasshopper?
Well. If you need to correct the design because, for example, your printer PLA filament withdraw of few nanometers after the extrusion, you don’t need to redesign everything wasting one afternoon just to add one millimetre on a perimeter to prevent it: if your parametric design was prepared correctly, you just need to move a slider and to adjust all your surface/geometry in one single step.
With this method, I was able to speeded up the prototyping phase of my ideas from mere conception to a working tangible object. Just amazing!
I freely put the generated .stl files on Thingverse for everyone purchased the same device from gglabs.us and want to print his/her own case for it: https://www.thingiverse.com/thing:3940965
To see the final result of 3D printing, below a few photos of the RS232 version.
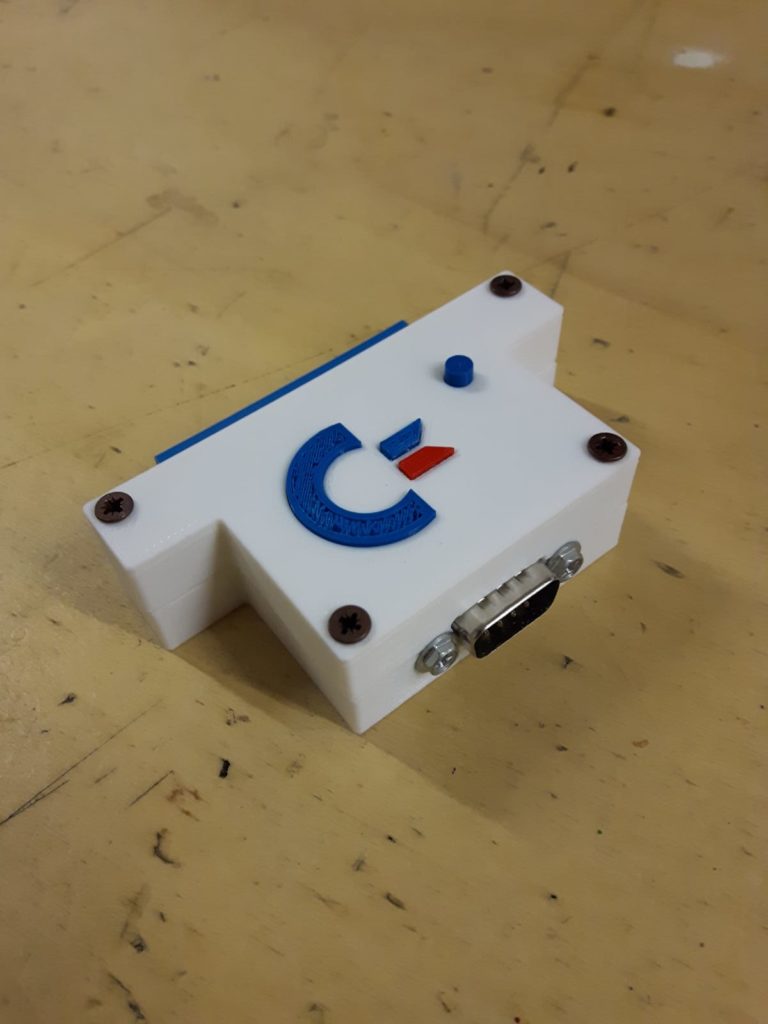

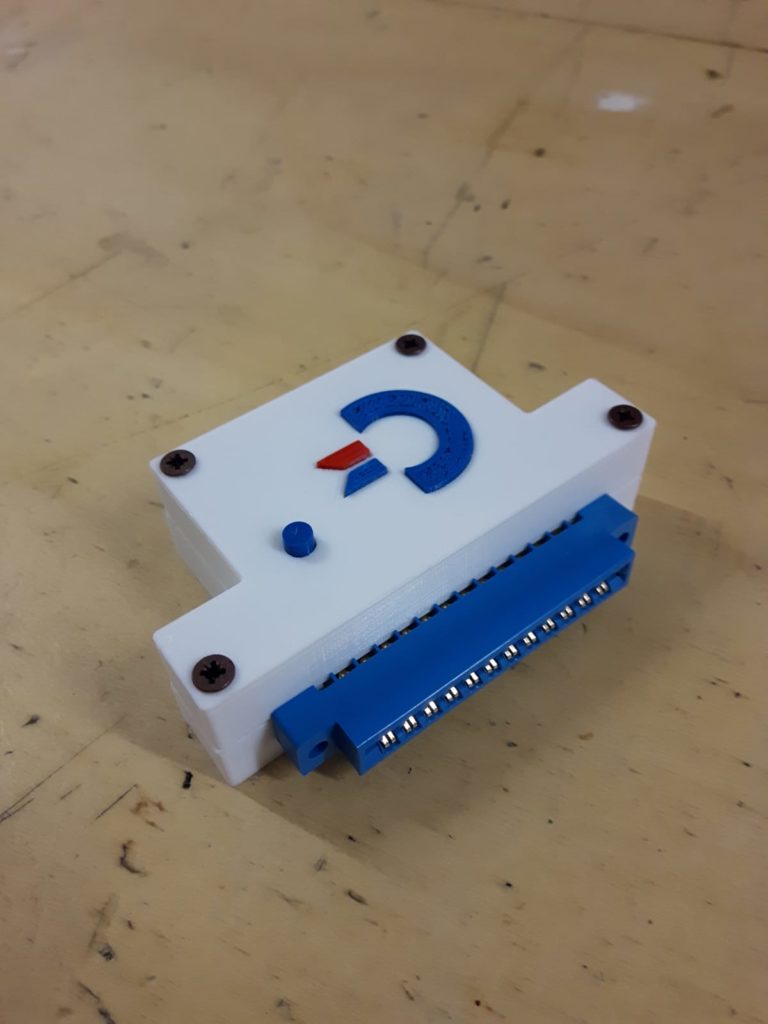
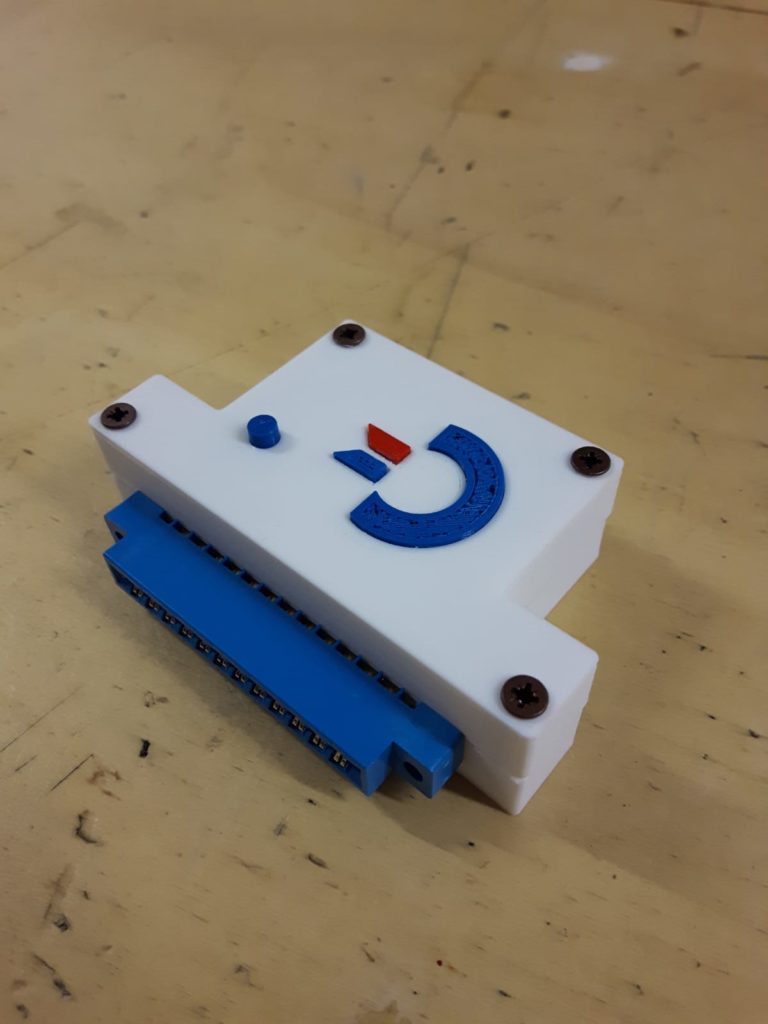
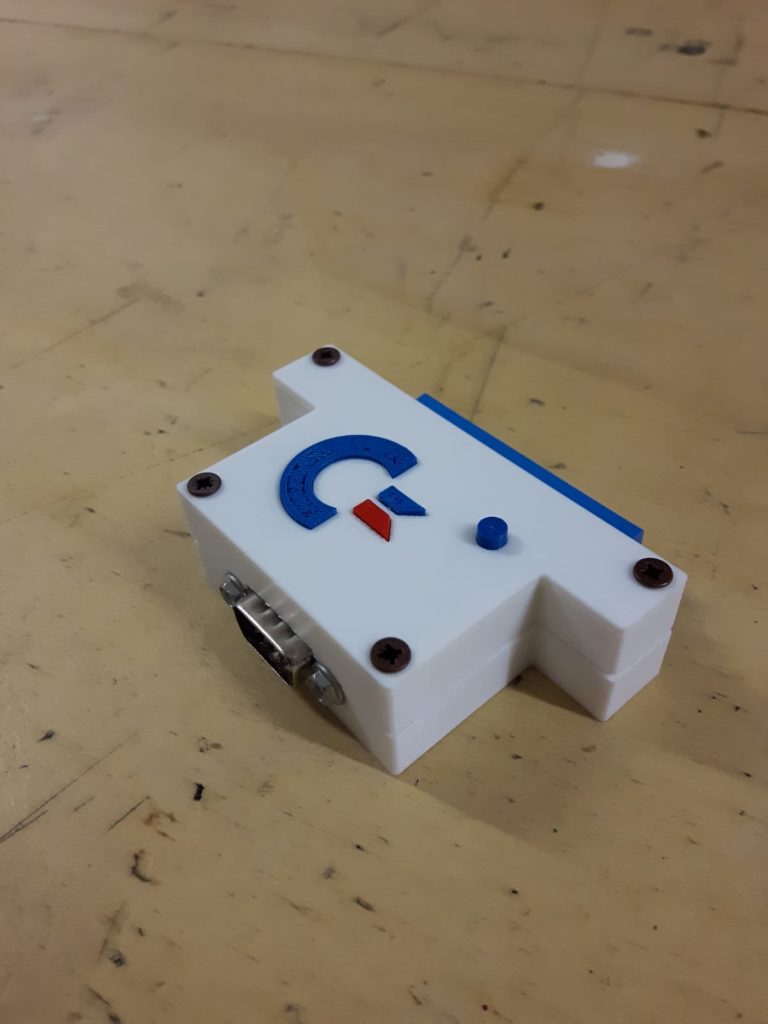


[Printed using a Flashforge Finder generation 1 with PLA filament.]
Thanks again to Giovanni for all the knowledge and patience he shared with me!